Monday, April 22, 2013

Instagram and Facebook!


Hey!

Quick note to let you guys know this blog will be updated with some new and exciting stuff. I officially graduated from Makeup School and can't wait to share some tips and tricks.

Follow me on Instagram under OMGITSPINK.

Follow my Business Facebook Account under STEFANIE RASSIAS.

And Follow this blog!! Lots of fun stuff coming up! Maybe even a give away or two ;)


Stef

Sunday, February 12, 2012

Quick Tip! - Lip Exfoliation


Everyone in the world, male or female, knows the pain and annoyance of chapped lips. The rough feeling, and the gross patchy scaly look of them. Especially in those winter months. This quick tip is simple and very effective to get those lips back to perfect pucker state.

All you need:
Olive oil
Sugar
Old tooth brush


First step is to use clean hands to apply a generous layer of olive oil onto your lips. Make sure you rub them together and really cover the surface. Now just simply let it sit and soften up your entire lip surface really well.While its doing its job, you can mix together a small amount of either white or brown sugar, (I use brown because its a little coarser, but you can use either one), and olive oil. You can fill up an old container if you want, I just do this for a time by time basis. I mix together about a half  a teaspoon of sugar, with just enough olive oil to make it a paste.You don't really want this runny, you want it to be a nice firm paste. Let the olive oil sit on your lips for ten minutes or so. Then, wet an old tooth brush, and gently start to scrub in that paste into your lips in small circles. Make sure you get the entire surface of both your upper and lower lip. I usually do this for about 5 minutes. Then rinse off your lips and if you are satisfied that you have completely smooth lips, re-apply a tiny amount of olive oil to put that moisture back into your lips, let them soak it up completely, and voila! Perfectly smooth, beautiful lips. Ready for you to swipe on your favorite lipstick and hit the town. :)

Extra tips:
-ALWAYS do this before wearing red lipstick.
-Exfoliate your lips once a month or anytime you see them getting very chapped.
-You can always use olive oil as chapstick if you run out.
-A great way to prevent chapped lips is to swipe on some Vaseline every night before bed.

Tuesday, January 24, 2012

3 Favorite Drugstore Products


This week I decided to do a post on something I get asked quite frequently, my favorite drug store products. I'm going to be honest, as soon as I discovered high end makeup, I pretty much said adios to the drugstore makeup I grew up using. That being said I'm sure there are still a few gems in the drugstore world. Here's three I enjoy.

Revlon Color Stay Liquid Foundation:

found at Shoppers Drug Mart (Canada)
Walmart (Canada + USA)
Runs for around $18 I believe.


This foundation is really good, if you enjoy medium coverage liquid foundations. It's very similar to MACS studio fix fluid foundation. I use this foundation if I run out of my MAC foundation or I'm in a bind. The only thing I strongly suggest is to use a foundation primer before you apply the foundation. It makes a world of difference. This formula comes in a variety of shades, and comes in two different formulas. One for combination/oily skin and one for dry/normal skin. A little goes a long way, it applies smoothly, blends easily and finishes to a beautiful slightly dewy finish. This has some decent lasting power as well, doesn't budge once you put it on with a good primer underneath and a good powder to set it. Comes in decent range of colors as well!


NYX  DOLL EYE MASCARA
Rexall (Canada)


This mascara truly surprised me. I am constantly on the search for a good mascara and I just grabbed this one on impulse one day. I usually use Benefits Badgal lash, which retails for about 30 dollars Canadian. I like this NYX mascara much better, and its only retails for about 8 dollars Canadian.  . Pretty sure this will be my new go to mascara.

It contains vitamin E, natural oils and nylon fibers which results in long full lashes that are still soft. It comes in three versions, volumizing, lengthening, and waterproof.


Batiste Dry Shampoo
Walmart (Canada/us)
Winners (Canada/us)


This is your typical dry shampoo. Sprays powder into your hair that soaks up all the grease and oil. Adds volume and makes your hair feel clean, light and manageable. This is the best dry shampoo I have ever used and it retails for about $8 Canadian. Works just as well as all the $20-$30 dollar cans. This comes in a few different versions. Original Batiste. Batiste for black and brunette which sprays a dark powder instead of white so it is less noticeable. Batiste Tropical and Diva and Blush which are three different smells. They also sell this in mini travel cans for your purse or desk at work :)

Tuesday, January 10, 2012

Product Review


Got to try out a couple new products this week, so I'm here to give you the scoop on Nars The Multiple in Orgasm, and Laura Mercier baked eyeshadow in Ballet Pink.

Nars The Multiple :

Purchase at Sephora, Or any NARS counter in The Bay.
$39

The Multiple is a multi purpose makeup stick. Its a cream to powder so it isn't necessary to set it.
You can use this stick on your eyes, lips, cheeks and body. It's available in a variety of shades.

The shade I'm reviewing is called Orgasm, it's a peachy pink shimmer that goes really well with fair skinned girls.

When I swiped this on my hand to swatch the color it went on beautifully smooth and creamy, but then as promised dried to a powder. I'm pretty impressed with the formula. You can wear this on its own on your cheeks, or put it on top of your foundation and powder. If you are using this as blush, I recommend using one of macs stippling brushes, the 131 works perfectly for this because of its small dense shape, swipe the brush against the stick and then stipple on the color with your brush. Small circles work best. Place the color where you want it, then use a kabuki brush and your face powder and buff away the edges of your blush to make it a nice seamless finish. You can use this as eyeshadow as well, just make sure you have a good eyeshadow primer on first. Its an option to use this as lipstick as well, though I haven't tried that yet, it being a cream to powder I don't see it lasting too well on the lip area, but maybe with a gloss on top. I don't recommend just using the stick on your face, that deposits quite a bit of color and it can be hard to work with. All in all I'm liking this product and think I'll be checking out some other shades!


Laura Mercier Baked Eyeshadow:

Purchase at Sephora or any Laura Mercier counter.

$22.

This is a baked eyeshadow that can be used wet or dry. It's very similar to MAC's mineralize eye shadows. Use it dry for a nice wash of color, or wet for a more vibrant intensity.
The shade I have is called Ballet Pink which is described as a pale peach pink but in all honesty to me it looks more like a champagne color. Its a beautiful highlight color, on both eyes and cheeks. You get a fair bit for the price and it comes in a variety of shades. This is my first Laura Mercier product and I'm pretty satisfied with it. It blends smoothly and has minimal fallout. Fine shimmer, not glittery. Great for a day at the office, or a night out. :)


Monday, June 6, 2011

Summer Makeup

Hey!

So summer is pretty much finally upon us and with it comes 25+ degree weather. Therefore we're talking sweat, beaches and swimming pools. Before you hit the beach make sure you've armed yourself with the right makeup!

First I'll give you a run down of my usual makeup look for those sweaty hot days.
You generally don't really feel like piling on the eyeshadow and eyeliner, and even if you do go through all that effort, you soon find to your dismay, that you look like a raccoon that was attacked with a blow dryer.
Go light on the eyes, pat on your eyeshadow primer and then a light shimmery shade all the way from your lash line to your brow bone. Hit your inner tear duct as well! Then a line of (preferably waterproof) eyeliner on the top, leave you waterline bare. Sweep on your (again preferably waterproof) mascara, and your eyes are done!

Now to make up for the light shimmery eyes, you can go heavier on the cheeks and lips. Use a good bronzer that makes you look bronzed and beautiful not orange.. (think J-Lo not Snooki), sweep it all over your cheeks or just use it to contour depending on your preference. Then apply a fun blush! I've really been liking Dollymix by MAC, its a bright deep pink color. Or you can go for a peachy look, for that I'm in love with Peachykeen by MAC. Sweep the blush all along your cheekbones and apples of your cheeks. Remember, no blush 2 fingers from your nose! Then apply a nice shimmer highlight color.

Don't forget your lips! Summer trend calls for bold lips, with the catchy phrase 'commit to a lip!' being the motto at all makeup counters. Swipe on some SPF lip balm or primer first, then a fun bright coral, pink, or red lipstick followed by some clear gloss to make your lips look full and luscious.

SPF- very important to have SPF on this summer. Lots of lip primers have SPF in them, and I really suggest investing in a makeup foundation primer that has SPF in it as well. MAC sells a great one called prep and prime face protect and it is SPF 50! Good stuff ladies. The bonus of the face primer is that its made for your face so it wont break you out, AND it will do its job and keep your foundation glued to your face and not melting off. Most foundations have a little SPF in them as well, but do yourself the favor and go the extra mile.

So that's your basic summer face, here's a list of waterproof makeup products that will help make your life easier.

Eyeliner: MAC's Liquidlast Eyeliner is a liquid liner that comes in several colors, and seriously will NOT COME OFF. I've taken a shower with this stuff on and it looked perfect afterwards.

Foundation: Haven't tried this yet but Makeup Forever sells a foundation called face and body that says its waterproof. Gonna pick it up and try it out, its gotten great reviews so far.

Lips: You can get lots of tinted lip balms, or Makeup Forever sells Aqua Creams for lips, blush, and eyes. These are waterproof and fabulous. Get a few shades. A champagne colored one to use as eyeshadow, and face highlight, and a nice berry or coral one to use for lips and blush.

Mascara: Tons of waterproof mascaras everywhere. I like badgal lash by benefit.

Hope this helps! Enjoy the beach!

Monday, March 28, 2011

FOTD

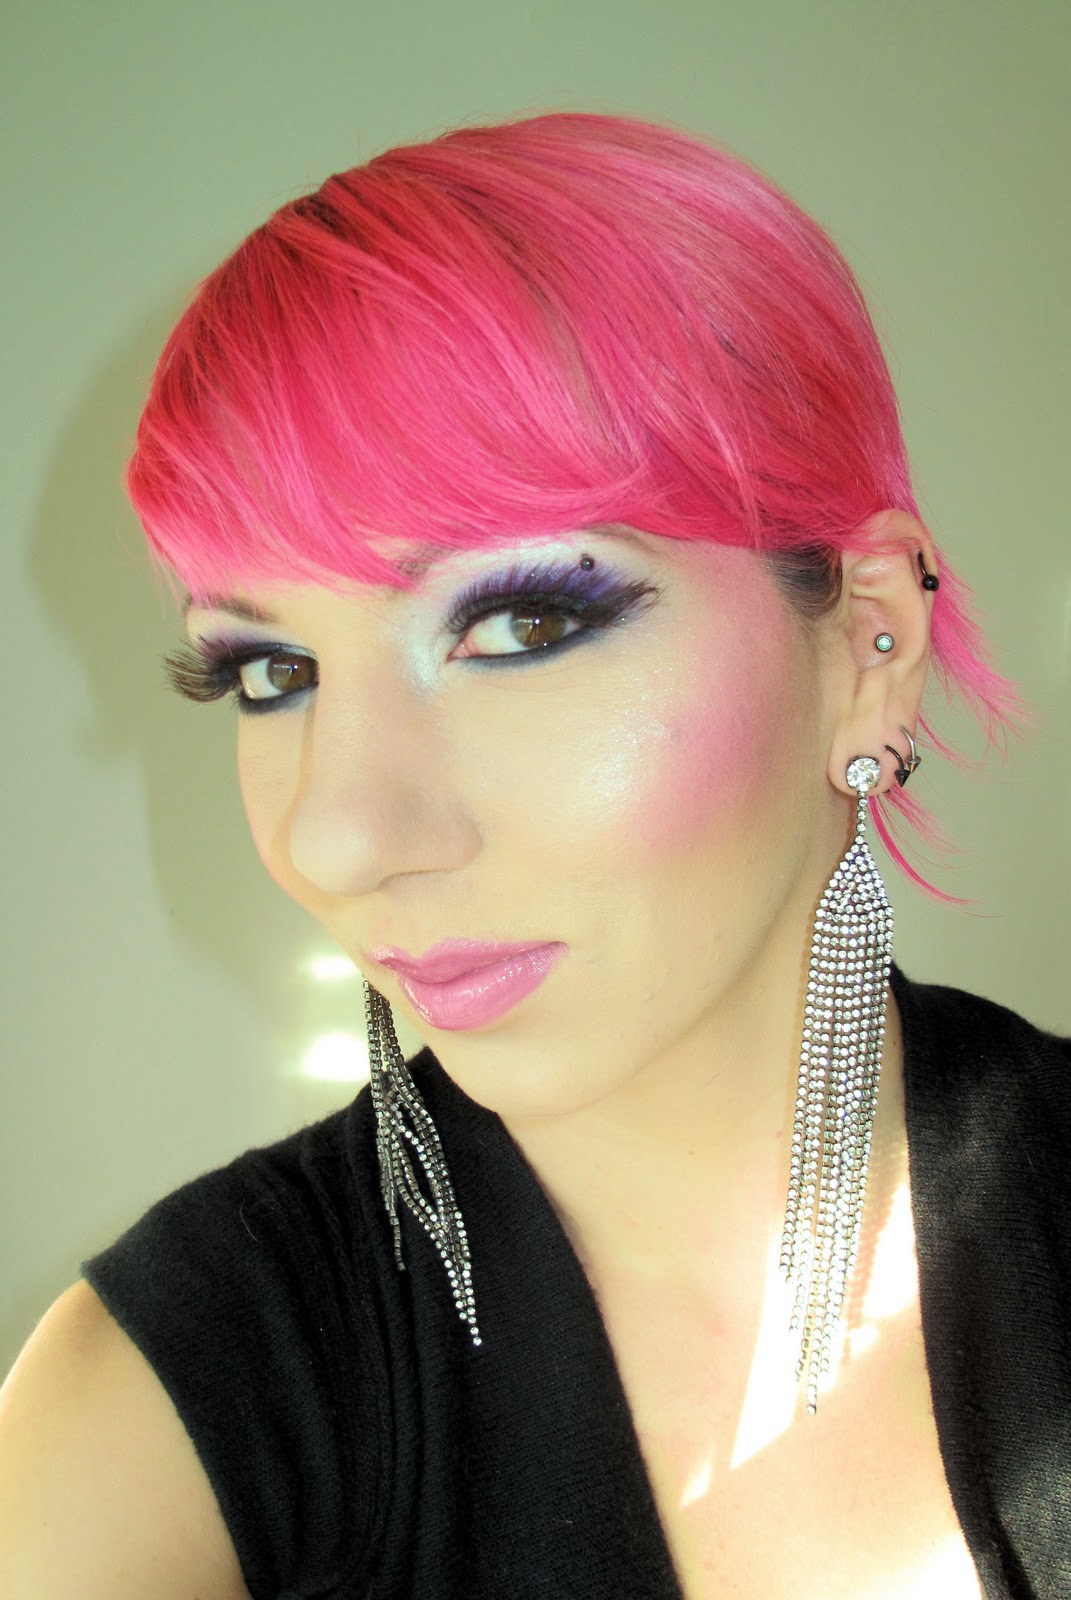
This is a look I came up with tonight because A)I have nowhere to go and B)I was bored. Not having to go anywhere means my makeup has no bounds so I went as far as I wanted to go with it. :)
Not for the faint of heart, this look is brought to you by a girl with pink hair.

Face:
mac-pro longwear foundation
mac-invisible set powder
mac-studio select concealer
mac-studio fix foundation
coastal scents- contour/blush palette

Cheeks:
mac-azalea blush
mac-silver dusk powder
mac-kitchamas pigment
coastal scents- contour/blush palette

Eyes:
mac-french quarter greasepaint stick
nyx-cottage cheese pencil
mac-later pigment
mac-softwash grey pigment
sugarpill-poison plum
mac-pure white pigment
mufe-301 star dust
mac-carbon
mac-graphblack technakohl liner
mac-quite natural paint pot in brows
mac lashes

Lips:
occ- hush lip tar
occ- hoochie lip tar
mac-creme de cup lipstick
mac- if its pink dazzle glass

Wednesday, March 23, 2011

Highlight Baby.

Hello Loves!
I've come to tell you of the wondrous tales of highlighting your skin. No, I don't mean the fluorescent yellow or neon pink kind!

high·light (hÄ«lÄ«t′)
noun
1. To make prominent; emphasize.

-

 One of my all time favourite makeup steps is highlighting. It's so simple and quick and gives a lot of dimension to your face. Highlighting is basically playing light tricks with your skin. There are tons of different kinds of highlighters; powder, liquid, gel, and cream. They all tend to be light tones, more often then not a champagne colour, and vary in different degrees of iridescent particles. (shimmer.) It's these particles that reflect light and cause the area you place them on to become more prominent.

Here’s a picture of my all time favourite kind of highlighter, MAC's Mineralize Skinfinish's. They sell 2 permanently, but constantly have different ones that are limited edition in collections that they release.


They all have veining throughout them, most are one solid colour with varying veining of lighter or darker versions of the same shade:


Or some are 3 or more bars of colour.:


A lot of MAC's skinfinishes have colour to them so you can use them as blush or to enhance your blush as well as to highlight. The ones with different bars of colour are meant to be used as individual colours, or all together in one sweep. There are certain colours that you don't want to use in certain areas..for instance, a pink or coral based highlighter will look fabulous as a cheek highlight, but will not look so hot as a brow highlight. Pink right under your eyebrows is a no go. Unless you wanna hit the fashion runways. Start with a champagne coloured highlight because that is universally flattering on all highlight areas. Then, once you feel confident in playing with different shades, invest in one with lots of bars of colour!

To apply a highlighter you want to use a medium sized fluffy brush for big areas, and a small fluffy brush for small areas.

Areas to highlight:

1.Cheekbones.
2.Bridge of nose.
3.Decolletage.
4.Brow Bone/Tear duct
5.Collarbones.
6.Shins.
7.Cupids bow

Cheekbones- Applying highlight to the tops of your cheekbones all the way to the hairline will make your cheekbones appear longer, thinner and more prominent, therefore also making your face look thinner.

Bridge of nose-Will bring light to the top of your nose, stay away from the tip, makes your nose look straighter and smaller/thinner.

Décolletage- Just the top of your cleavage, it will make them appear bigger and plumper..always a favourite highlight spot of mine ;)

Browbone/Tear duct-This you probably do anyways when you do your eye makeup. No one should leave their house without highlighting their brow bones and tear ducts(not IN your tear duct, just in that area beside your nose.) Even if you don't wear any other makeup, this will bring light to those areas and make your eyes look bigger and make you look more awake.

Collarbones- This will make your collarbones stand out which is just sexy in general. Makes your chest look very sculpted and feminine.

Shins- Clearly this is a summer thing, but running some highlighter down the front of your shins will make your legs appear longer and even bronzy/sexy for those summer dresses.

Cupids Bow- This is that area on the very top of your lips where they make that bow shape. Directly under your nose. Put a tiny bit of highlight in that little pocket and your lips will look bigger and plumper.

One quick tip about applying blush/bronzer/highlight to your cheeks. You NEVER want to put anything shiny under your eyes. It will look terrible and ridiculous. To find the proper area to place colour on your cheeks, take your index finger and middle finger together, place them vertically beside your nose. You do not want any colour in the area that your fingers cover. Now take your index finger and place it horizontally under your eye, right under your lower lash line. You do not want any colour or shimmer there either. Remember how I said putting shimmer on an area brings attention to it? You do not want any attention given to your under eye area. I promise. Also that shimmer will enhance the wrinkles and dark circles you have there.

That being said, go and highlight! You will love the definition and dimension it will bring to your face, especially when you combine it with contouring which I will talk to you about soon!

If you have any requests or questions leave them in the comments! Don't forget to share this blog with your friends!

<3

Friday, March 11, 2011

Estee Lauder Warehouse Sale

Today I got to go to the Estee Lauder Warehouse Sale in Markham.
Estee Lauder owns MAC so you can bet I was ALL over getting some discounted MAC products!! The warehouse sales are great to because they sell a lot of limited edition items that are long gone from stores. It runs Friday, Saturday and Sunday. I went on Friday to make sure nothing would be sold out! It opened at 10am and I got there at 8am to wait in line..2 hour wait in the cold! The things I do to look good. There were $4 bargain bins but I waited too long and by the time I got there the line up was way too long. At the end you hand in your ticket and get a free gift, and there is also a $5 grab bag. The proceeds from that go to breast cancer :)

Here's a list of what I got and how much it was :

green gel Cleanser -$12
cleanse off oil -$12
oil control lotion -$12
brunette msf -$15
redhead msf -$15
blonde msf -$15
bronze bronzing powder -$15
3d gold glitter -$15
3d silver glitter -$15
hi def cyan pigment -$15
lazy day lipstick -$10
lavender whip lipstick -$10
goldy rocks dazzleglass -$10
pinkie pencil -$9
float on by eye kohl -$9
rosemary and thyme eyekohl -$9
272 brush -$20
$5 grab bag
I got two of these:
41 lashes
mineralize loose foundation in medium deep
boy bait cremesheen
mineralize all over lotion

free gift-
double pencil sharpener

Came to around $240!

Successful day. Till next time... <3
Monday, February 28, 2011

Hair Care!

Straying somewhat from makeup, lets talk hair products.

Here are some of my 'Go To' products:

A/G Fast FoodThis is probably the BEST leave in conditioner I've ever used. It really helped my hair A LOT right after I bleached it an immense amount to make it the (amazing) pink color it is now.
You can find this at most beauty supply stores, I picked up another bottle from Trade Secrets the other day.
This runs about $20 - $25 dollars and will last you months. After you wash your hair rub a quarter size of this products between your hands and then run your hands all throughout your hair. It detangles, smells amazing and really puts back in some moisture.
                      

BONACURE HAIR THERAPY COLOR SAVE SHAMPOO:I have a big problem finding shampoos that I like. So many of them are so bad for your hair, stripping out all the moisture and damaging it. Paul Mitchell shampoo one actually damaged my hair to the point I needed to use hair masks to fix it. This shampoo is one of the best I've used. It's sulfate free which is one thing to look for in a good shampoo. I use the color save formula because of my pink hair but I think I may try out the other formulas of this line when I finish this bottle. This is my second bottle of this formula though and I do really like it. It doesn't sud up that much so it might feel weird at first but you get used to it. It smells great and really leaves your hair feeling soft and clean. I got this from a salon for around $15 but I'm sure beauty supply stores carry the line as well.


ION PURIFYING SOLUTIONS CLARIFYING SHAMPOO:Everyone should be using a clarifying shampoo once or twice a month. The clarifying shampoo gets rid of all the gunk and build up regular shampoos, conditioners, styling products like gel and hair spray leave on your hair. As well as getting rid of build up from environmental impurities. These are stronger then normal shampoos though so only used them once or twice a month and make sure you do a good conditioning treatment after. Using this will help prevent limp, lifeless, dull lackluster hair. Pick this up from Sally's Beauty Supply for around $15.

ION EFFECTIVE CARE TREATMENT:Getting into protein treatments now, this is a product that I use as my every day conditioner. It is a protein/moisture treatment, but I myself find it pretty mild. It is meant to bring back some of the protein and moisture to your hair. I get it in the giant bottle from Sally's Beauty Supply for about $20. I got this originally to use it once in a while as a protein treatment, but I find I need stronger protein but I do like how this feels in my hair. It makes my hair smooth and detangled as soon as I put it in in the shower. If you have pretty average hair without much damage I suggest picking this up for the protein and moisture you need.

JOICO K-PAK RECONSTRUCT:This is a great protein treatment. This is just protein not moisture. You can pick it up from beauty supply shops or just from Walmart or The Superstore. It smells great and will make your hair feel stronger instantly. Wash hair, wring out excess water, apply this, let it sit for 5 minutes and then wash out. Runs about $25.


DERM ORGANIC ARGAN OIL MASQUE:Argan oil is amazing for your hair. You can pick it up in its pure form and use it on your hair or you can get products with it in them. This is a fantastic hair masque. I slathered this all over my hair and left it in for about 4 hours. My hair was so smooth soft and silky afterwards. It smells lovely and really brings back some of that moisture. Kind of expensive I think this bottle was $30 from Trade Secrets.


REDKEN EXTREME CAT PROTEIN THERAPY TREATMENT:This stuff is fabulous. I have only used it twice but in my search for a truly good deep protein treatment I think I finally found something really worthwhile. My sister in law is a hair dresser and introduced me to some great Redken products. Good thing to because Redken is on the lower priced scale of hair products and most of it is available at Walmart. For this I went to The Beauty Supply Outlet. This was about $21.99. When you are in the shower after shampooing, wring out excess water, spray this all over your hair concentrating on ends, let it sit for 5 - 10 minutes and then rinse out and condition as usual. I instantly felt a noticeable difference in the strength of my hair with this stuff. I have a good feeling about the results I'll get from long term use.


HASK HENNA N PLACENTA WITH OLIVE OIL:Yes you read that right. Don't worry.. at least its only animal placenta.. Placenta is actually one of the greatest things to use on your hair. These two treatments are for moisture. One of the treatments is a hot treatment and the other is like a conditioning mask. The hot treatment you must place in a bowl of hot water, then apply to hair,throw on a shower cap to retain heat, let it sit for as long as you want! The other treatment is similar, Just shampoo hair, put this all over your hair, work it in well, throw on a shower cap to retain heat and let it sit for as long as you want. These are both great and super cheap. Runs for about $3 - $4 each at Sally's Beauty Supply.


PAUL MITCHELL SUPER SKINNY SERUM:This is a great serum to use on wet or dry hair. After you shower before you blow dry apply one pump to your palms and work through ends to roots of your hair. Don't over do it though, serums can really weigh your hair down quickly. Blow dry and then flat iron hair, then use half a pump to really smooth down hair and bring shine. My hair has never been so soft and silky! Love this stuff and will continue to repurchase. $20 at Beauty Supply Stores.

REDKEN IRON SILK 07:Another great product so far. Only just started to use this but it is a heat protectant meant for use before heat styling. Spray on sections and then flat iron. This really makes the hair stay straight and seems to bring a lot of shine to the hair as well. Pleased so far! $22 from The Beauty Supply Store.


BEDHEAD MANIPULATOR:This is a product I have used for the last 8 years. I'd say I like it! This is a styling product for after blowdrying / flat ironing. I  rub a small amount between my fingers and then work and play with different parts of my hair to create more layers and texture. Also good to scrunch hair with! This is an oldie but a goodie that I always recommend. $24 at Walmart.


So those are my picks for some awesome hair products! Try em out and hopefully they work for you just as well!

Tuesday, February 22, 2011

Smokey Eye LOTD

This was done very quickly without too much effort. I was bored and ended up liking the result enough to share!
Eyes:
mac-painterly paint pot
mac-french quarter grease paint stick
mac-dark soul pigment
mac-frozen white pigment
mac-softwash grey pigment
mac-silver fog pigment
mac-pure white pigment
mac-scene eyeshadow
mac-carbon eyeshadow
mac-reflects gold
mac-graphblack technakohl
mac-42 lashes
mac-black black chromaline
mac-quite natural paint pot(brows)
nyx-jumbo pencil in cottage cheese

cheeks:
hot pink from coastal scents blush palette
mac-hush ccb
mac-soft and gentle msf
mac-refined golden bronzer

lips:
mac-show orchid lipstick
mac-pink poodle lipglass


Monday, February 21, 2011

Some Bright Lip Options

Wanted to share some of my favorite bright lipsticks with you!
These are all from MAC and I can't wait to start rocking these this spring.

From L to R-
Neon Orange (limited edition)
Impassioned
Show Orchid
Toxic Tale (limited edition)
Costa Chic


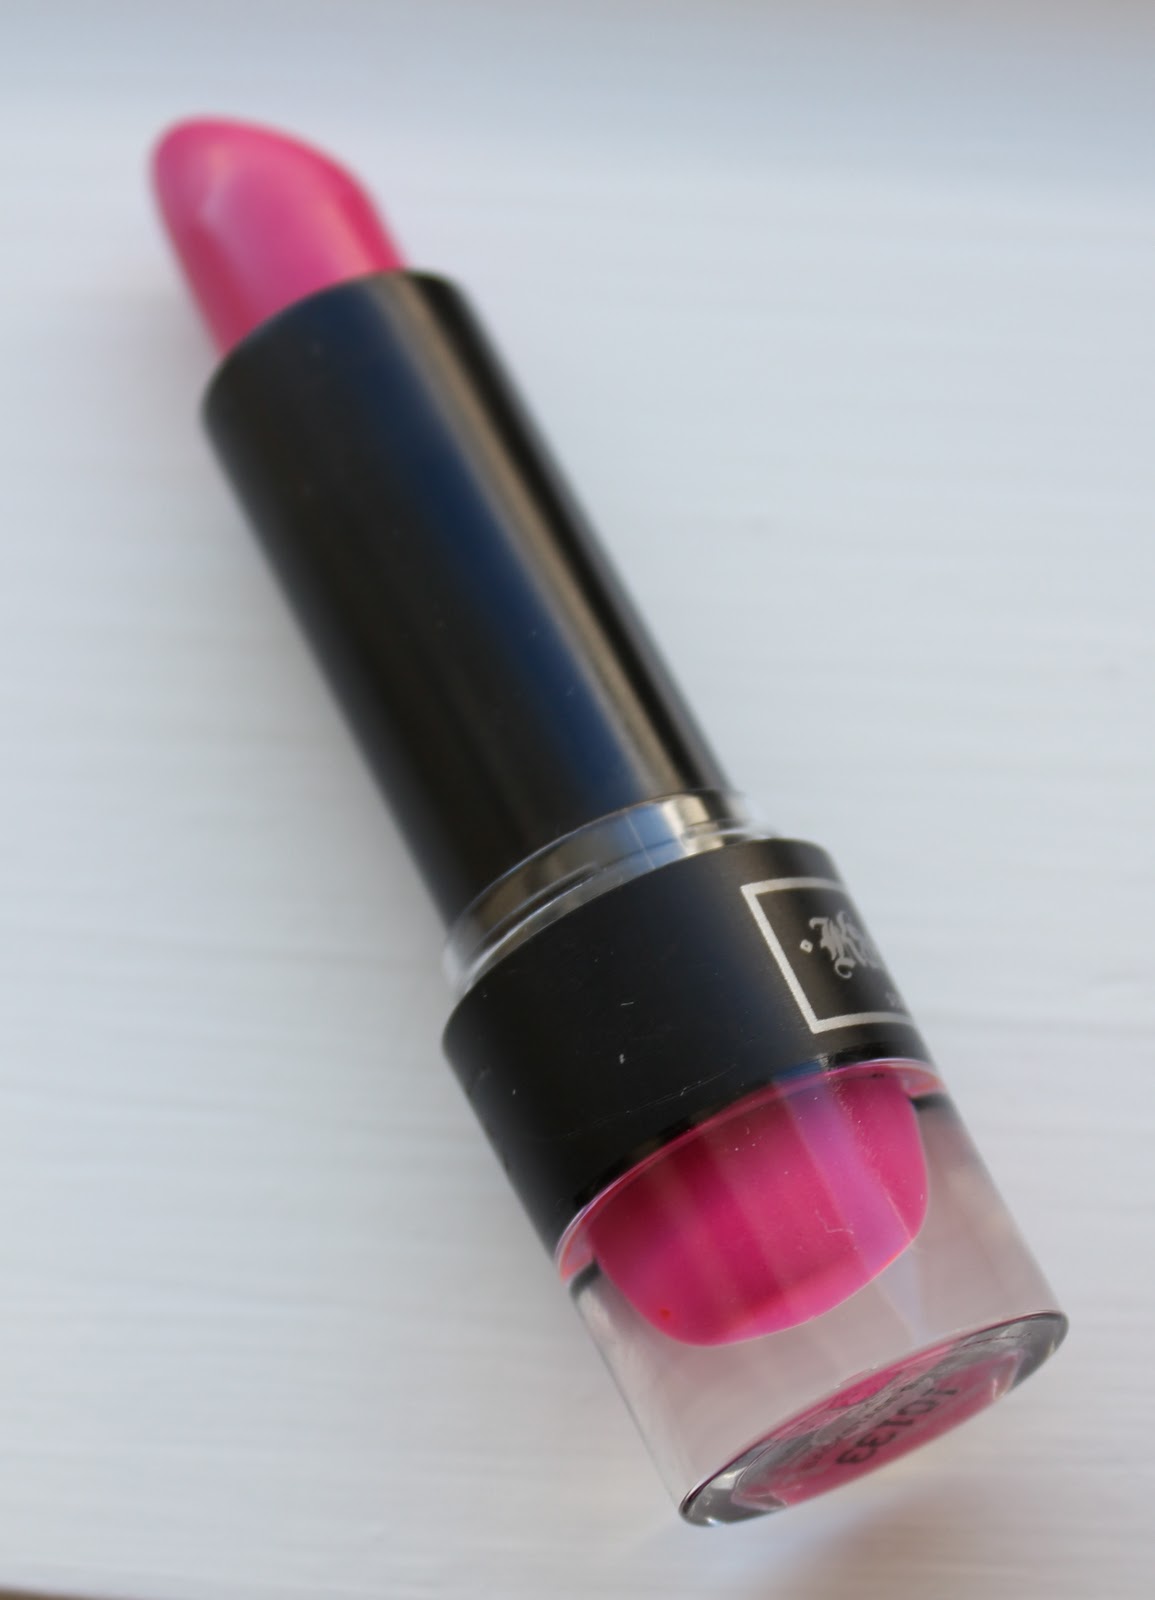
Kat Von D has a great pink lipstick that I will be picking up soon, its called Backstage Bambi. Bright beautiful pink!


MAC lipsticks are available at any MAC location, they are $17.50

Kat Von D is sold at Sephora and her lipsticks are $21.00

I'll be back with a new post soon with some great eyeshadows to pick up to make sure those eyes pop this spring!

Saturday, February 19, 2011

Spring Makeup Trends 2011

Even though there is still snow swirling around out there, its never too early to start planning and stocking up your spring makeup! This spring there are 4 main makeup trends we are seeing on the runways.

BOLD LIPS!:
Time to shy away from your nudes and neutrals and grab that hot pink lipstick! It's all about bright colorful lips this spring. Hot pinks, oranges, and corals. If you aren't a bright lip person try grabbing your favorite shade and after swiping it on your lips, dab them with a Kleenex. Most of the color will be gone, and you'll just have a bright stain left. Another way to tone down but still be bright is grabbing a nude lip gloss and swiping that on top. My advice: don't be shy!! Grab those hot lipsticks and go to town. (or school, or work, wherever!) Hot pinks and corals are easier to pull off then red lipstick so don't be scared! If you need help finding your shade, go to any MAC counter. The artists there are more then happy to help you try on and find your favorite shade!  Here's some pictures of what we saw on the runway.


BRIGHT EYES!:
This spring has a lot of pastels, and a lot of bright colorful eyes! Clearly this spring is very color orientated.
Whip out those electric blues, bright purples and emerald greens. We saw them being used all over as a wash with some thick black liner, or several bright hues used together. Bright colors don't always = clown makeup. I promise. Just find a shade that makes your eyes pop and swipe that over your lids, line with some black liner and heavy coats of mascara and you are ready to go. Feeling shy? Opt for a neutral lid, and swipe on some colored liner. No one will be able to stop staring at how sexy your eyes look with a teal winged liner. Again, having trouble finding the right shade? Hit that MAC counter and try out colors, ask the artists there to try some on you. Some bright eye looks we saw:


NATURAL MAKEUP!:
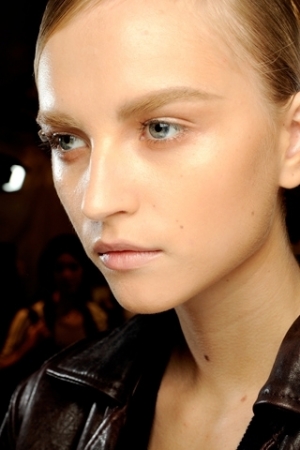
This is one makeup trend that never goes out of style. The easiest of all trends, flawless,dewy skin, shimmery cheeks, and nude lips. Swipe on a lot of liner and mascara so your eyes don't disappear. If you are feeling adventurous this is a great look to pair with those fake lashes you never wear.


SMOKEY EYES!:
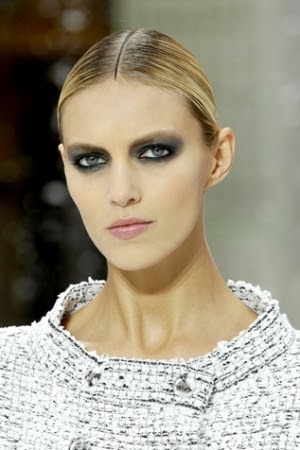
Last but definitely not least, another never dying makeup trend. The smokey eye. Elusive, seductive and always sexy. Mix it up this spring by straying from the over done silver,grey and black smokey eye. Opt for a color, like navy/steel blue or eggplant. Smoke out the shadow as far up and low as you feel comfortable with, throw on that liner and mascara and march out the door confident in your spring makeup trend knowledge.